MapAddressPicker iOS Control User Guide
Thank you for purchasing my iOS control. If you have any questions that are beyond the scope of this help file, please feel free to email via my user page contact form here. Thanks so much!
Table of Contents
- Quick Start
- Overview
- Installation
- Using Address Picker in your app
- Customization
- Localization
- 3rd Party Libraries
Quick Start
It takes only 2 minutes to add control into your app.
Step 1: Drag and Drop Source Code
Unpack source code and drag and drop AddressPickerControl folder into your Xcode project.
Step 2: Install Cocoapods libraries
Step 3: Drop UIView into new View Controller
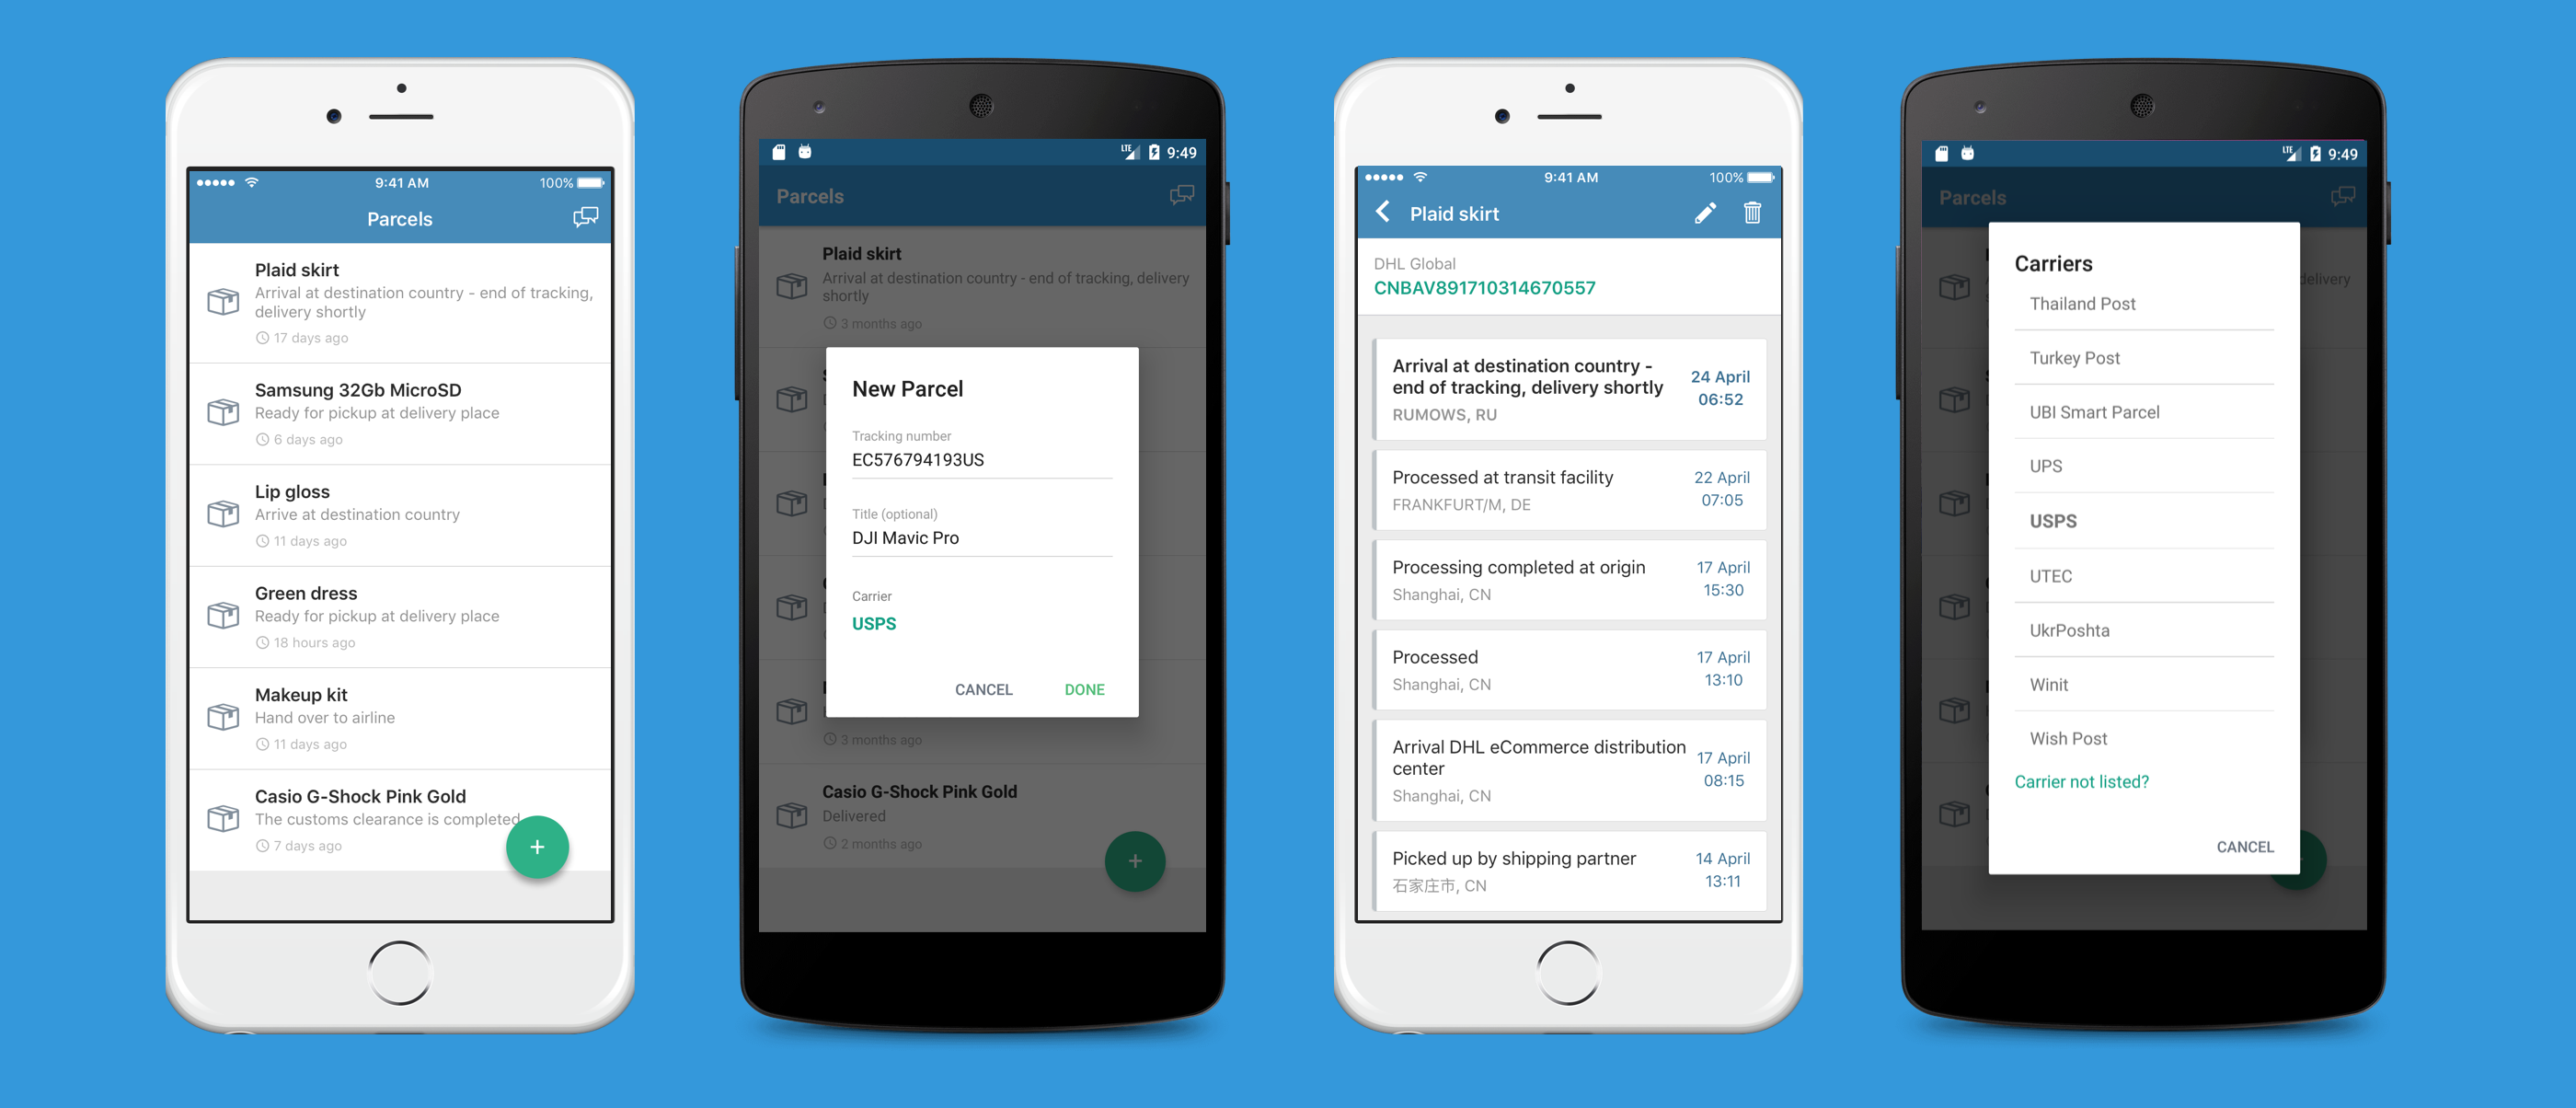
Overview
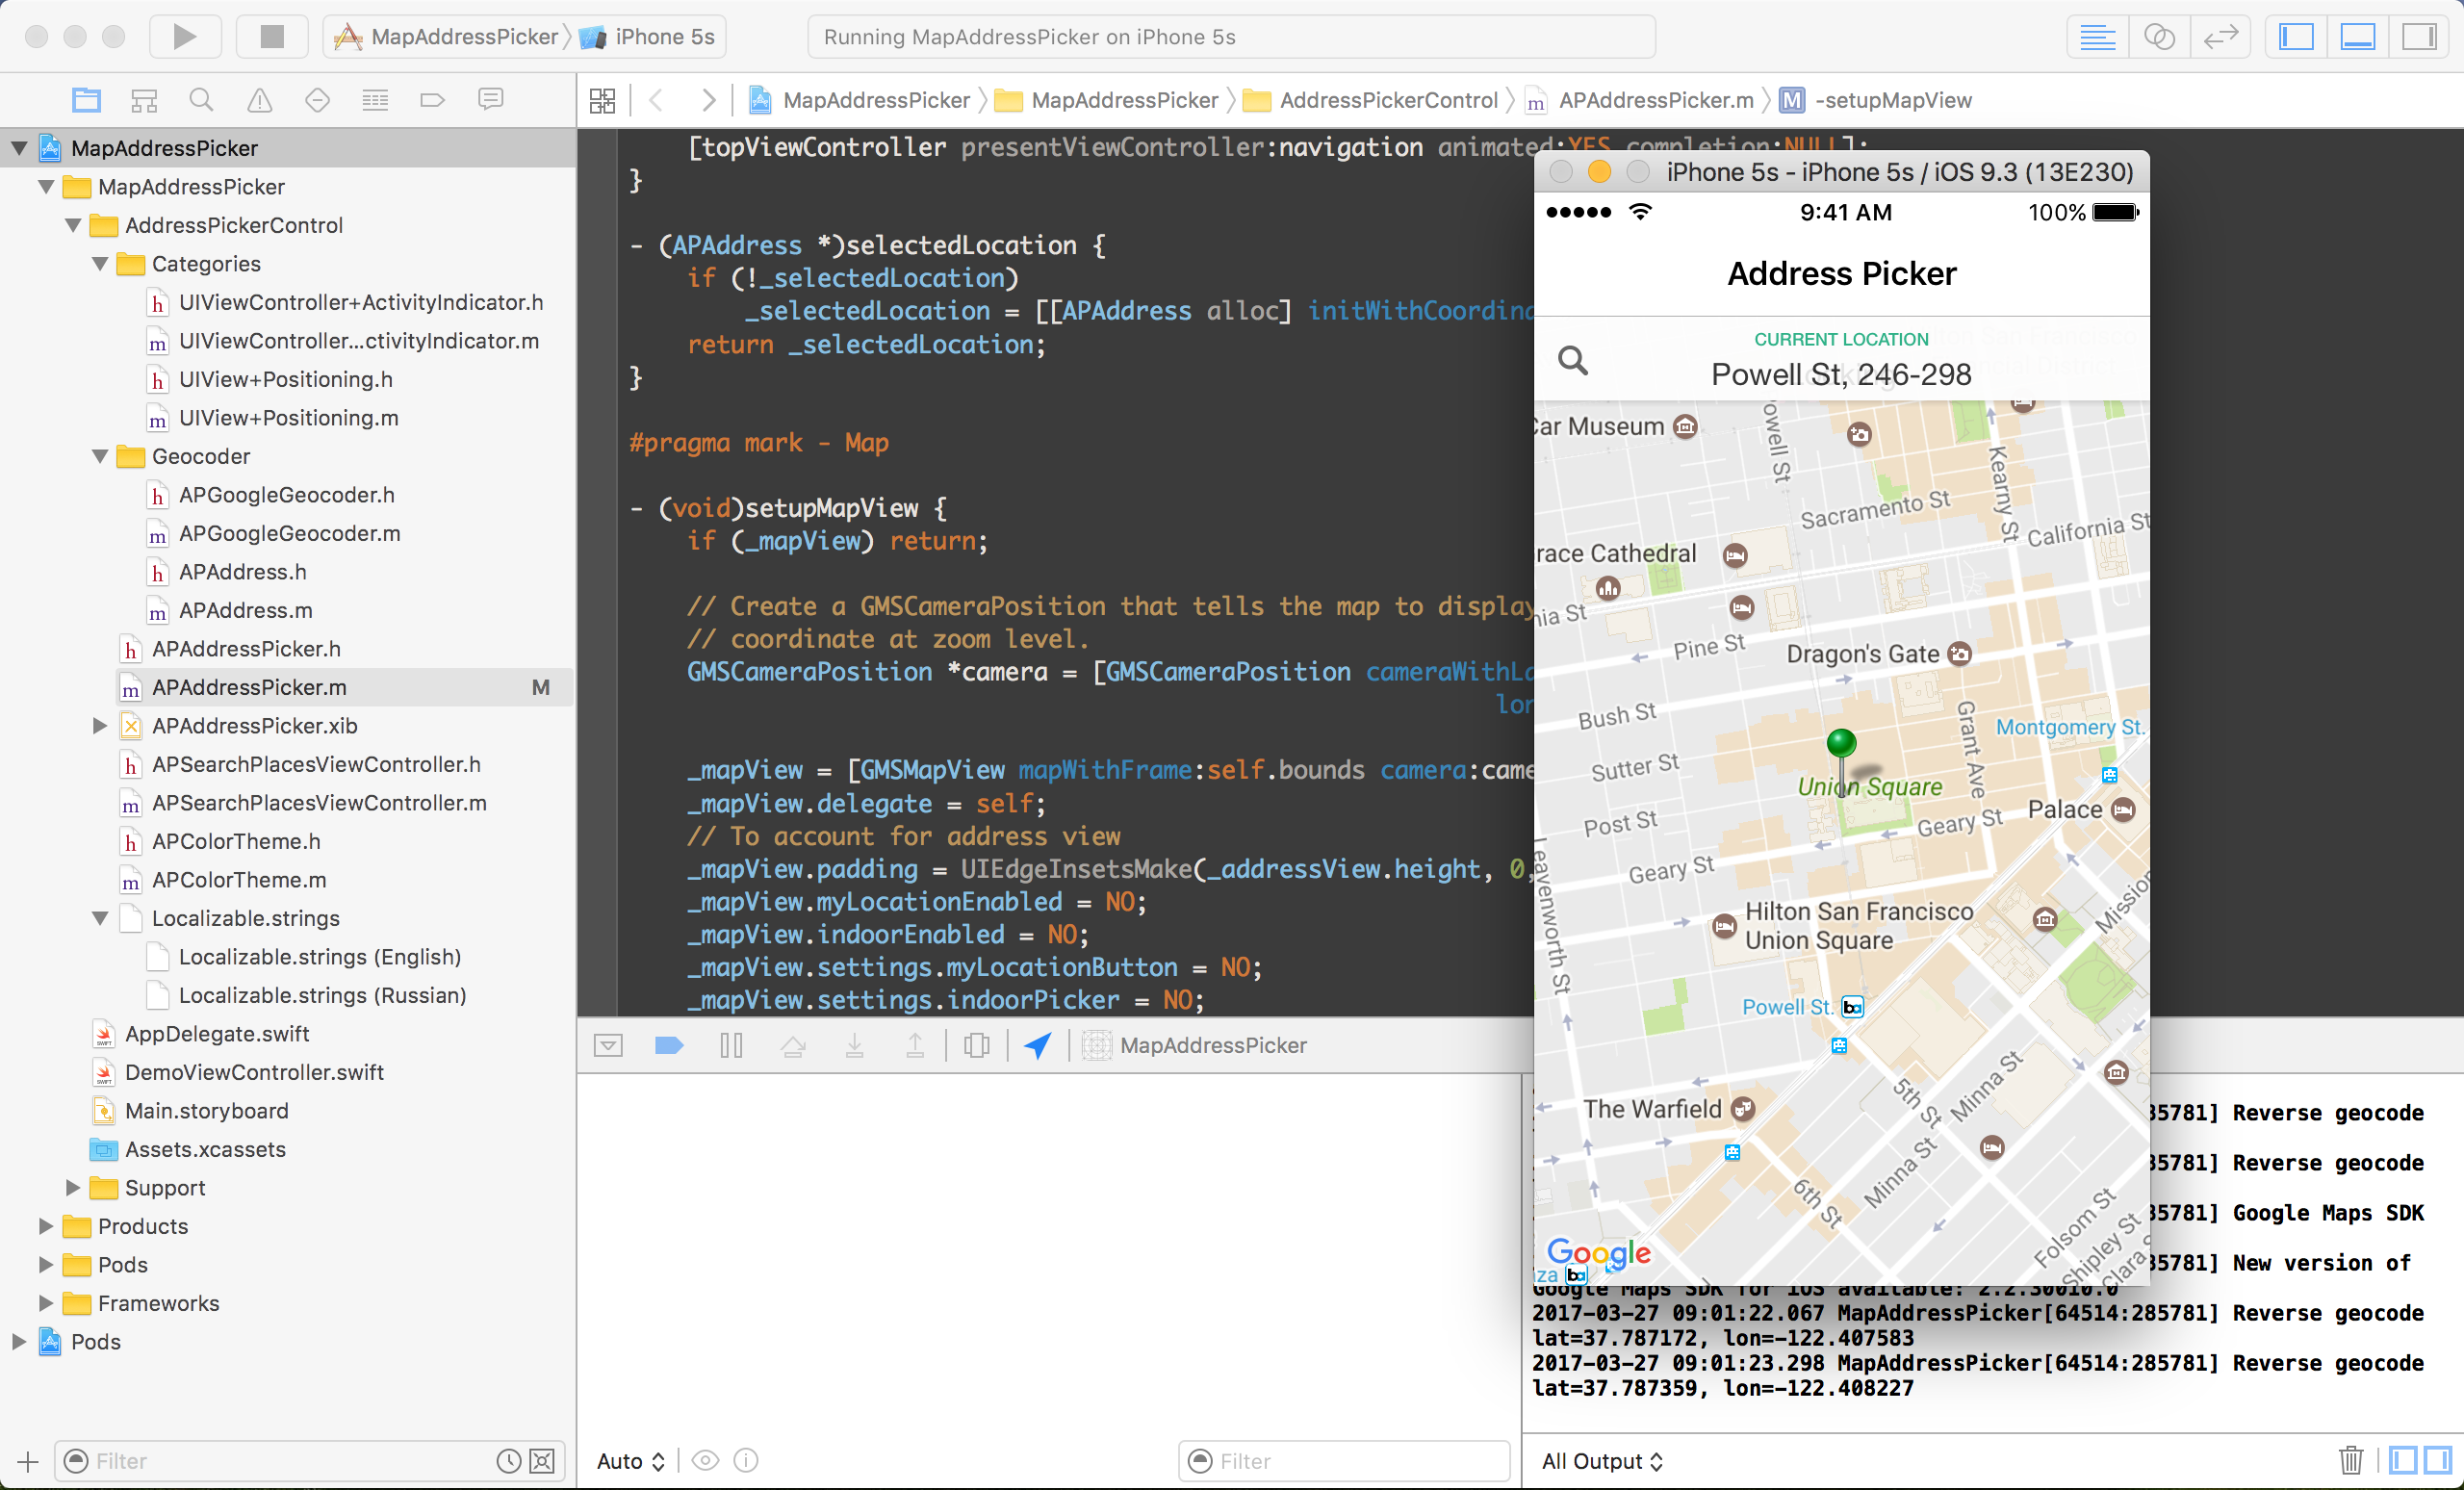
MapAddressPicker is a convinient drag-to-select control to save time for your users picking their address. Just drag the map until pin is at desired location and instantly see latitude & longitude coordinates reverse geocoded to physical address.
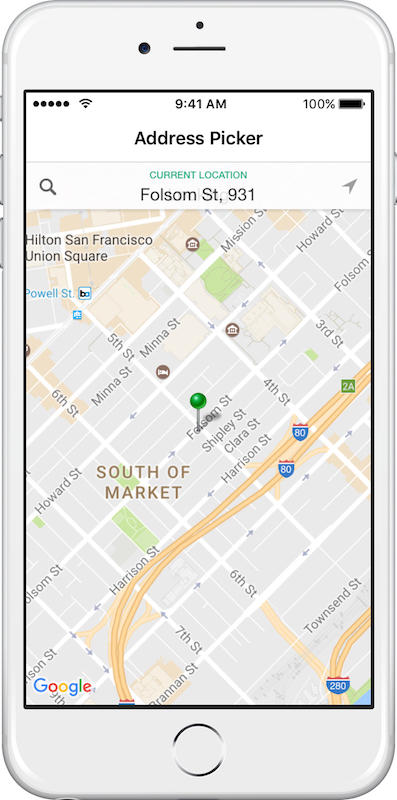 MapAddressPicker: Folsom St in San Francisco
You may have seen similar behavior in Uber or Lyft applications. You can even type street address and building number and controll will query Google & Foursquare to give you a list of possible addresses and venues.
If you are building mobile commerce, on-demand delivery or food delivery application this control will save you and your users time by letting them easily pick delivery or pickup address on the map.
Code
MapAddressPicker is written Objective-C and fully compatible with latest iOS and Xcode versions. MapAddressPicker is also fully interoperable with Swift. Code is clean and nicely structured. Main components of the control are:
- APAddressPicker - Main control class that you instantiate manually or by adding it to UIViewController in Interface Builder.
- APSearchPlacesViewController - View controller that is shown when user taps address bar and allows searching for places and addresses by typing them.
- APColorTheme - Contains all colors used in the control for easy skinning.
- APGoogleGeocoder - Google Geocoder API wrapper implements geocoding of addresses to coordinates and reverse geocoding of coordinates to addresses
- APAddress - Container class for the selected address.
- UIView+Positioning - UIView category with useful syntactic sugar.
- UIViewController+ActivityIndicator - UIViewController category to easily show and hide UIActivityIndicator during lengthy operations.
- Localizable.strings - All strings extracted from the control, ready for localization.
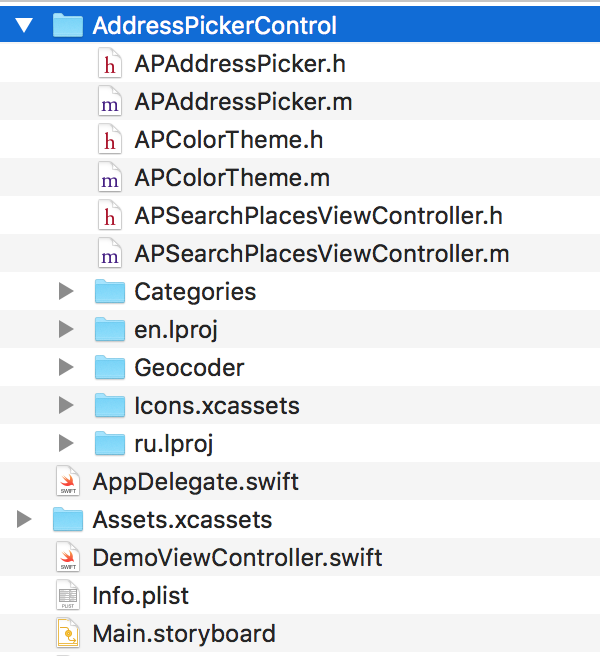
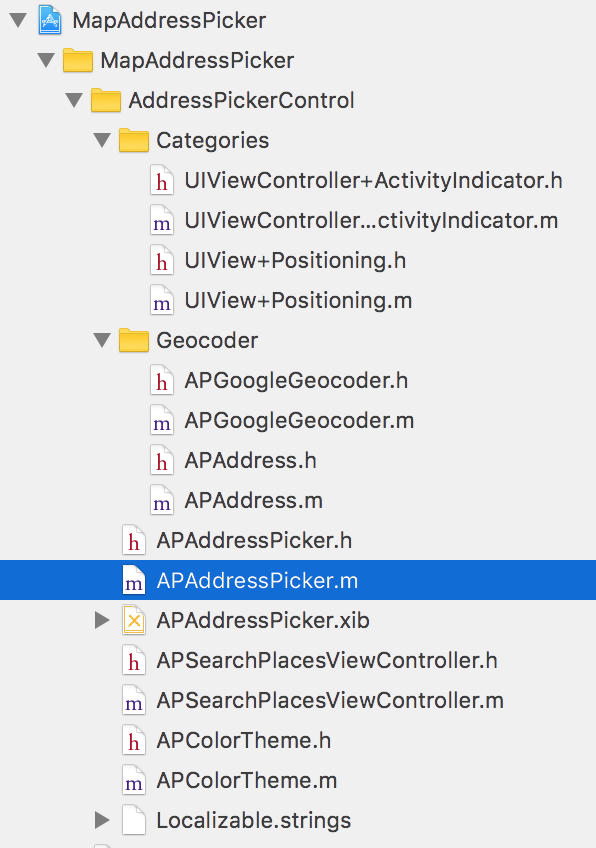 Xcode code structure
Installation
Unpack downloaded .zip file into your ~/Desktop folder, launch Terminal and change current folder to the folder with unpacked code cd ~/Desktop/MapAddressPicker.
Next, you need to install Cocoapods dependencies. Make sure you have Cocoapods ruby gem installed by running gem install cocoapods in Terminal.
Type pod install while inside source folder you unpacked code to earlier. You should see output similar to screenshot below.
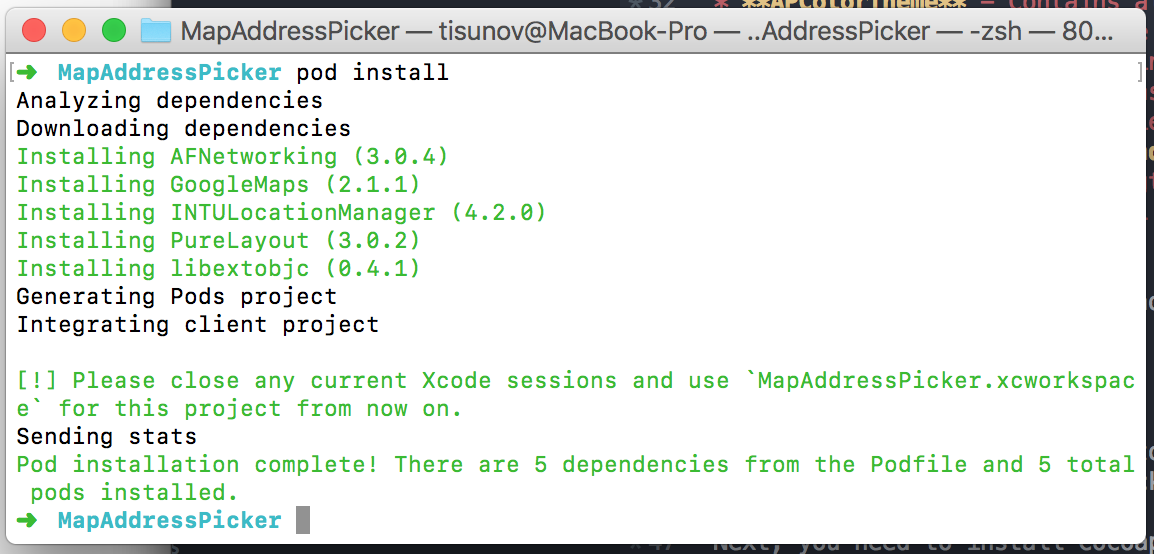
pod install
Launch Xcode, open MapAddressPicker.xcworkspace, navigate to Product->Run or just press Cmd+R to build and run demo project with control in iOS Simulator.
Using Address Picker in your app
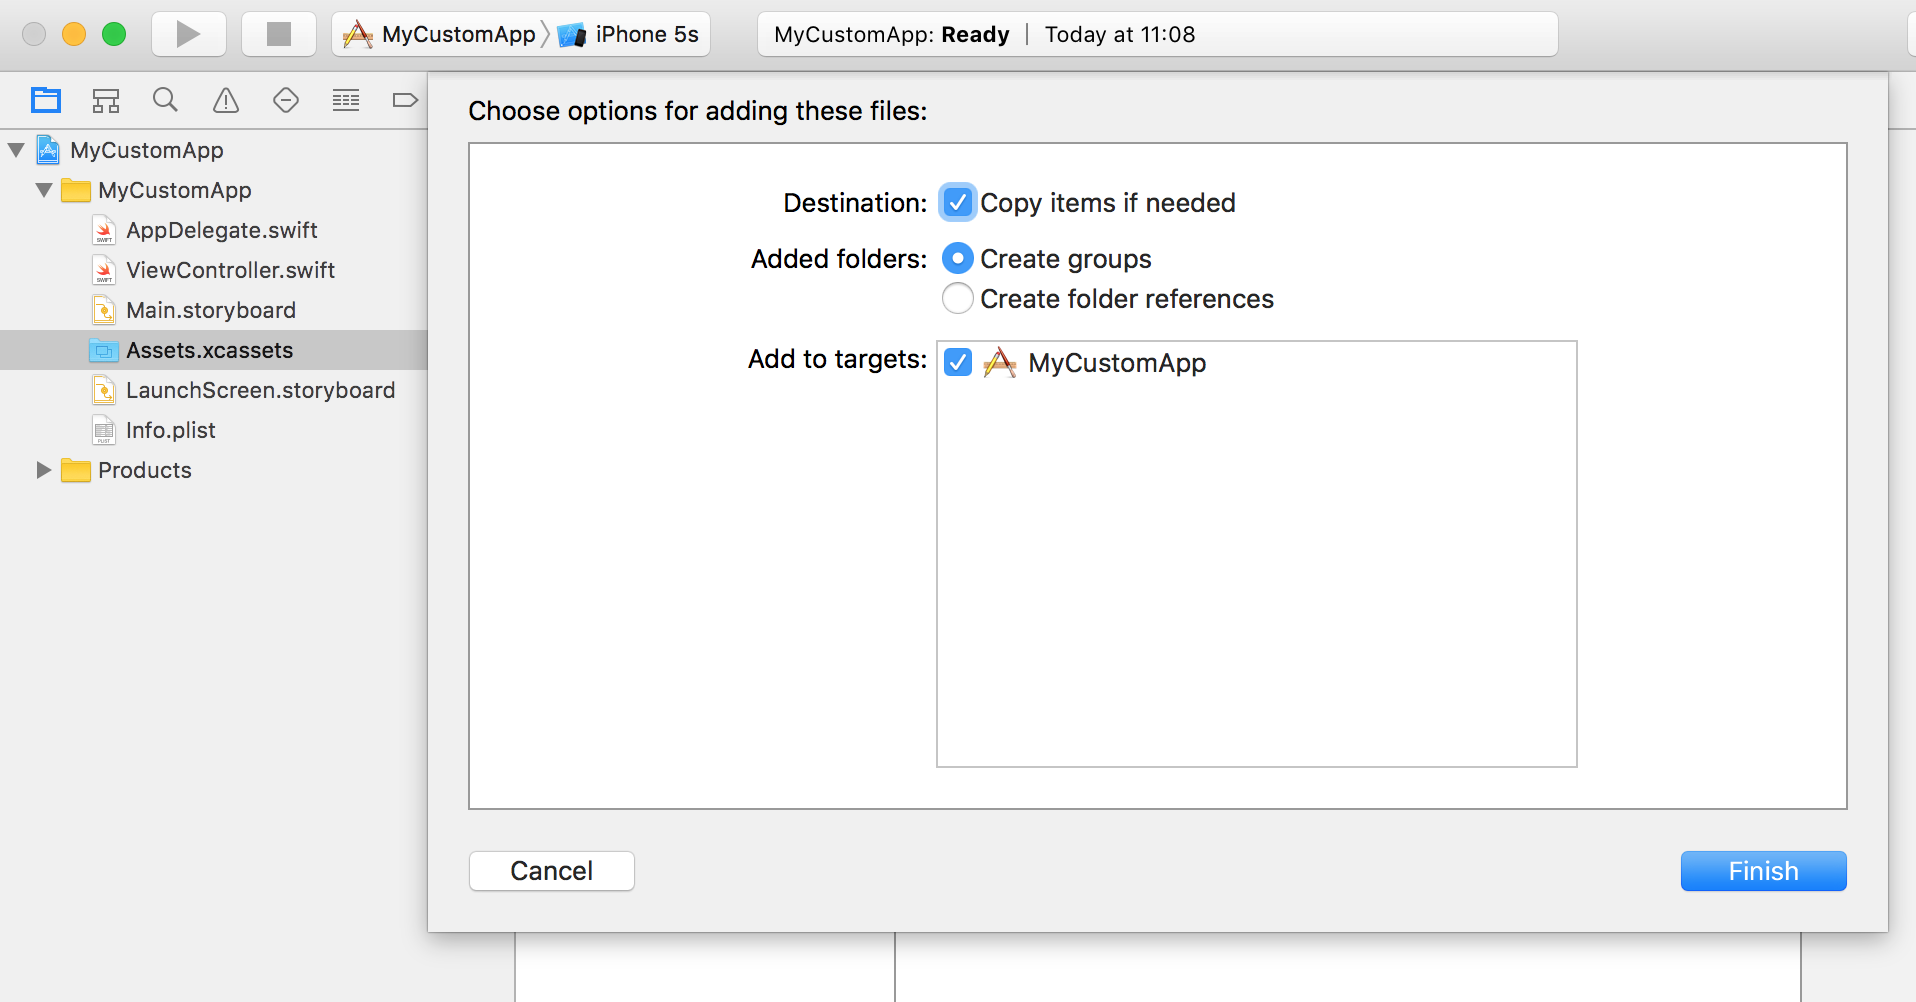
Drag and drop AddressPickerControl folder from Finder into your Xcode project.
Xcode will ask how you would like to add files, make sure Copy items if needed and Create groups are selected before pressing Finish.
Add Cocoapods
Create Podfile file in the root folder of Xcode project with following content.
platform :ios, '9.0'
source 'https://github.com/CocoaPods/Specs.git'
use_frameworks!

target "MapAddressPicker" do
    pod 'AFNetworking', '~> 3.0.0'
    pod 'GoogleMaps'
    pod 'PureLayout'
    pod 'INTULocationManager'
    pod 'libextobjc'
end
If you are aready using Cocoapods then add following lines to it
pod 'AFNetworking', '~> 3.0.0'
pod 'GoogleMaps'
pod 'PureLayout'
pod 'INTULocationManager'
pod 'libextobjc'
Install pods dependencies by running pod install.
Add App Transport Security key to Info.plist
App Transport Security, introduced in iOS 9, improves user security and privacy by requiring apps to use secure network connections over HTTPS. GoogleMaps iOS SDK used by the MapAddressPicker loads its resources by HTTP, and you need to enable HTTP use for your app.
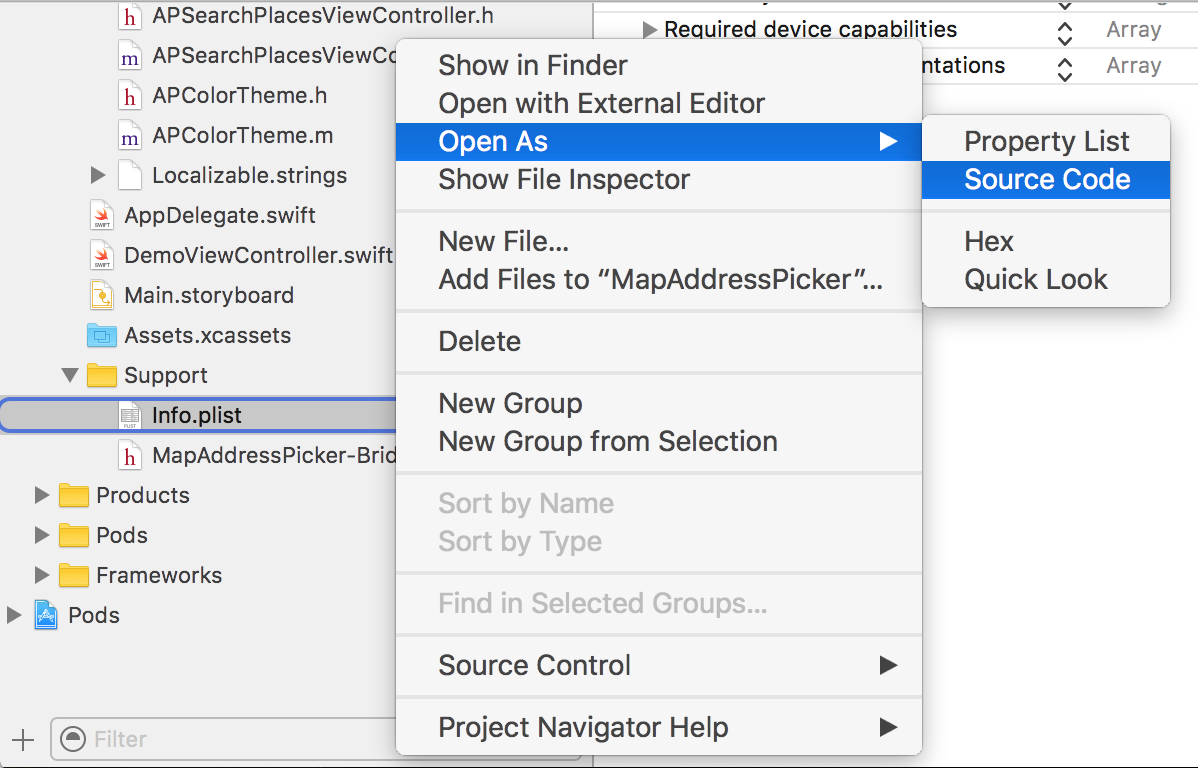
Find Info.plist in your Xcode project, right-click it and select Open As -> Source Code.
And insert following xml before closing </dict> tag.
<key>NSAppTransportSecurity</key>
<dict>
  <key>NSExceptionDomains</key>
  <dict>
    <key>google.com</key>
    <dict>
      <key>NSExceptionAllowsInsecureHTTPLoads</key>
      <true/>
    </dict>
  </dict>
</dict>
Add NSLocationWhenInUseUsageDescription to Info.plist
MapAddressPicker accesses Location Services just once during initialization to center map on user’s current location. You need to add NSLocationWhenInUseUsageDescription key to Info.plist file.
Press + button in Info.plist property editor to add NSLocationWhenInUseUsageDescription string key and write a description that will be shown to user before he approves Location Services access.

Change API keys
To you MapAddress Picker in your own application you have to change Google Maps API Key and Foursquare API app ID and Secret.
Google Maps SDK for iOS
Go to Google Maps SDK for iOS and press GET A KEY button to create new API key for your app.
Replace GOOGLE_MAPS_API_KEY value in APAddressPicker.m with your API key.
APAddressPicker.m
#define GOOGLE_MAPS_API_KEY @"AFzaShA4ymE5MoOkmTcxq-R1jLFb1uJd_W4R3TA"Foursquare
Go to Foursquare API, signup and register your app with Foursquare to get Client ID and Client Secret to use Foursquare API from your app.
Replace FOURSQUARE_CLIENT_ID & FOURSQUARE_CLIENT_SECRET values in APSearchPlacesViewController.m with your own.
APSearchPlacesViewController.m
#define FOURSQUARE_CLIENT_ID @"SAKDJNJK5IHY0SMMHIGT213S100HX3NGRASKJKNWJK3342J"
#define FOURSQUARE_CLIENT_SECRET @"ASKDNJSQF5NRXWJBLZOH3J1YZ1VGGCDMKB2LJCXESSJKNDJK"
How to use control with Storyboard
MapAddressPicker is a custom UIView subclass and can be inserted into Xib and Storyboard or can be created manually in code.
Find View object in Object Library in Xcode Utilites pane and drag it to your Storyboard’s view controller that you’ll use to display
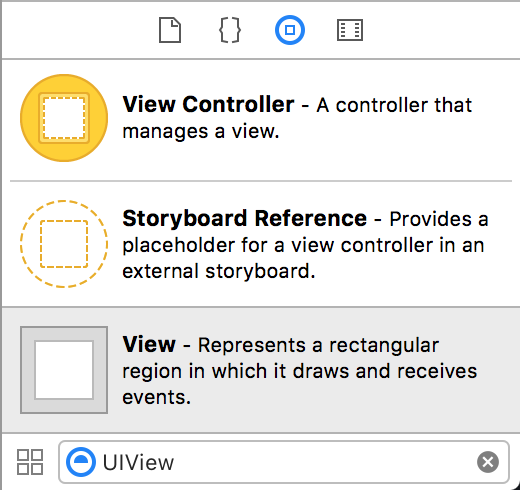
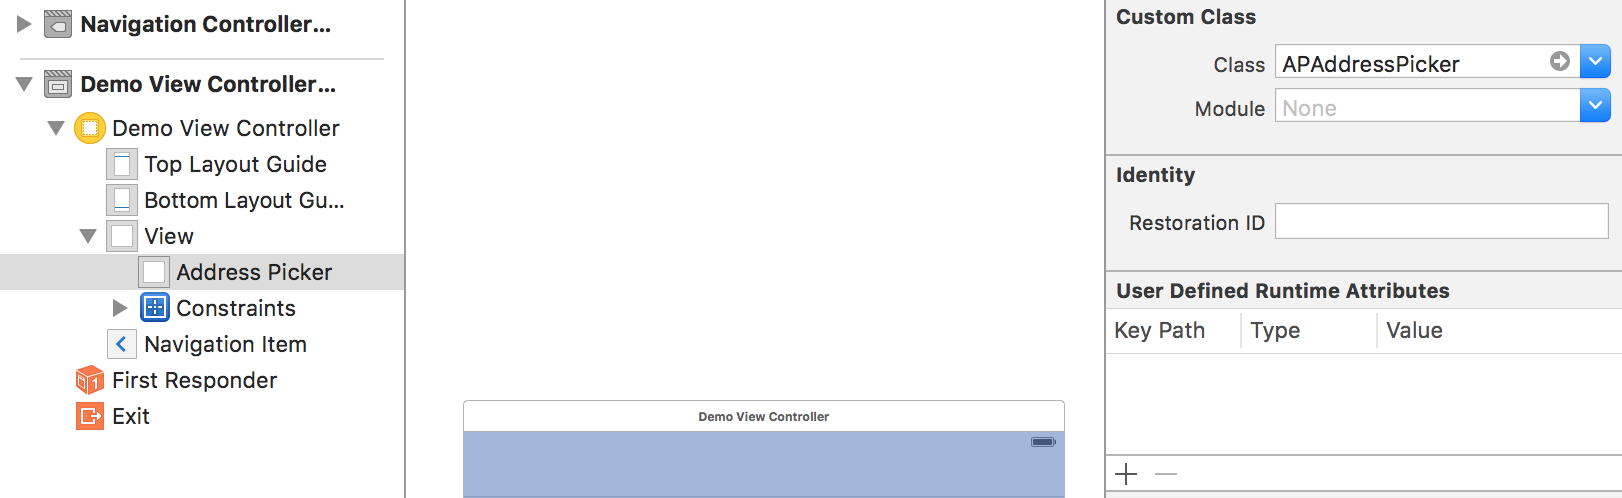
Select View you just drag & dropped, open ‘Identity Inspector’ (press Cmd+Alt+3) and under section Custom Class enter APAddressPicker as a class name. Optionally set autolayout constraints on your view.
How to create control in code
Swift
class DemoViewController: UIViewController {

    var addressPicker: APAddressPicker!

    override func viewDidLoad() {
        super.viewDidLoad()

        let addressPicker = APAddressPicker.init(frame: view.bounds)
        view.addSubview(addressPicker)
    }
}
How to get selected address
Access APAddressPicker::selectedAddress property of type APAddress, it always contains selected address.
APAddress.h
@interface APAddress : NSObject

// Convenience constructors
-(id)initWithGoogleAddress:(NSDictionary *)address;
-(id)initWithReverseGeocoderResults:(NSArray *)results latitude:(double)latitude longitude:(double)longitude;
-(id)initWithCoordinate:(CLLocationCoordinate2D)coordinate;
-(id)initWithFoursquareVenue:(NSDictionary *)venue;

// Public properties
@property (nonatomic, copy, readonly) NSString *name;
@property (nonatomic, copy, readonly) NSString *type;
@property (nonatomic, copy, readonly) NSString *streetAddress;
@property (nonatomic, copy, readonly) NSString *region;
@property (nonatomic, copy, readonly) NSString *city;
@property (nonatomic, copy) NSNumber *latitude;
@property (nonatomic, copy) NSNumber *longitude;

-(CLLocationCoordinate2D)coordinate;
-(NSString *)formattedAddressWithCity:(BOOL)includeCity country:(BOOL)includeCountry;
@end
Customization
It’s easy to customize control to match your app look. You can replace default icons, change color theme or default map location when control shows up on screen.
Icons
Control uses 6 icons which you can replace with your own. You can find them in Icons.xcassets. Drag and drop your custom icons into Icons.xcassets to replace default ones.
![]() Address Picker Icons
Address Picker Icons
Colors
Change control’s color to match your app look. Find color theme in APColorTheme class.
APColorTheme.h
@interface APColorTheme : NSObject

// AddressPicker colors
+ (UIColor *)addressBarTitleColor;
+ (UIColor *)addressBarAddressColor;

// SearchBar colors
+ (UIColor *)searchNavigationBarBackgroundColor;
+ (UIColor *)searchSearchBarCancelButtonColor;
+ (UIColor *)searchSearchBarCancelButtonDisabledColor;
+ (UIColor *)searchSearchBarTintColor;

+ (UIColor *)activityIndicatorColor;

// 'Nothing Found' overlay colors
+ (UIColor *)searchNothingFoundOverlayColor;
+ (UIColor *)searchNothingFoundTextColor;

// TableView header colors
+ (UIColor *)searchTableHeaderBackgroundColor;
+ (UIColor *)searchTableHeaderTextColor;

// TableView cell colors
+ (UIColor *)searchTableCellBackgroundColor;
+ (UIColor *)searchTableCellTextColor;
+ (UIColor *)searchTableCellHighlightedTextColor;
+ (UIColor *)searchTableCellSelectedBackgroundColor;
+ (UIColor *)searchTableCellDetailTextColor;
+ (UIColor *)searchTableCellDetailHighlightedTextColor;

@end
Default map location
The default behaviour is to center map on San Francisco, CA coordinates, query current user location using Location Services and move map to the current location. You can change default map location by setting latitude and longitude at the top of APAddressPicker.m
APAddressPicker.m
#define DEFAULT_MAP_LATITUDE 37.774929
#define DEFAULT_MAP_LONGITUDE -122.419416
Localization
All strings are ready for localization. To add new localization go to Xcode Project Settings by clicking on your project in Xcode Project Navigator.
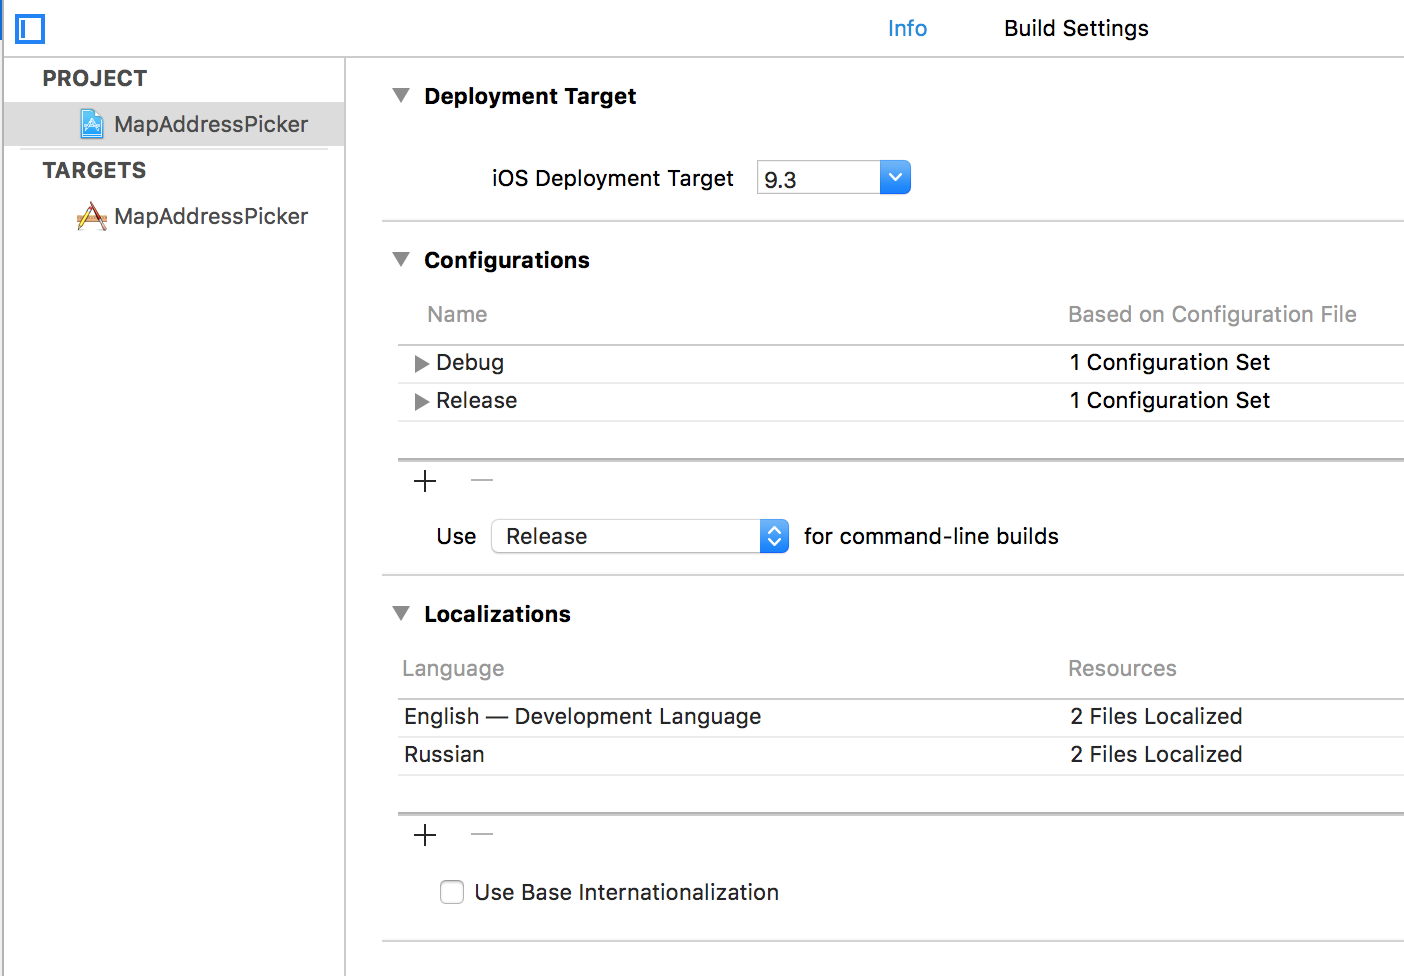 Xcode Project Settings
Under Localizations section click ‘+’ button and select your localization language.
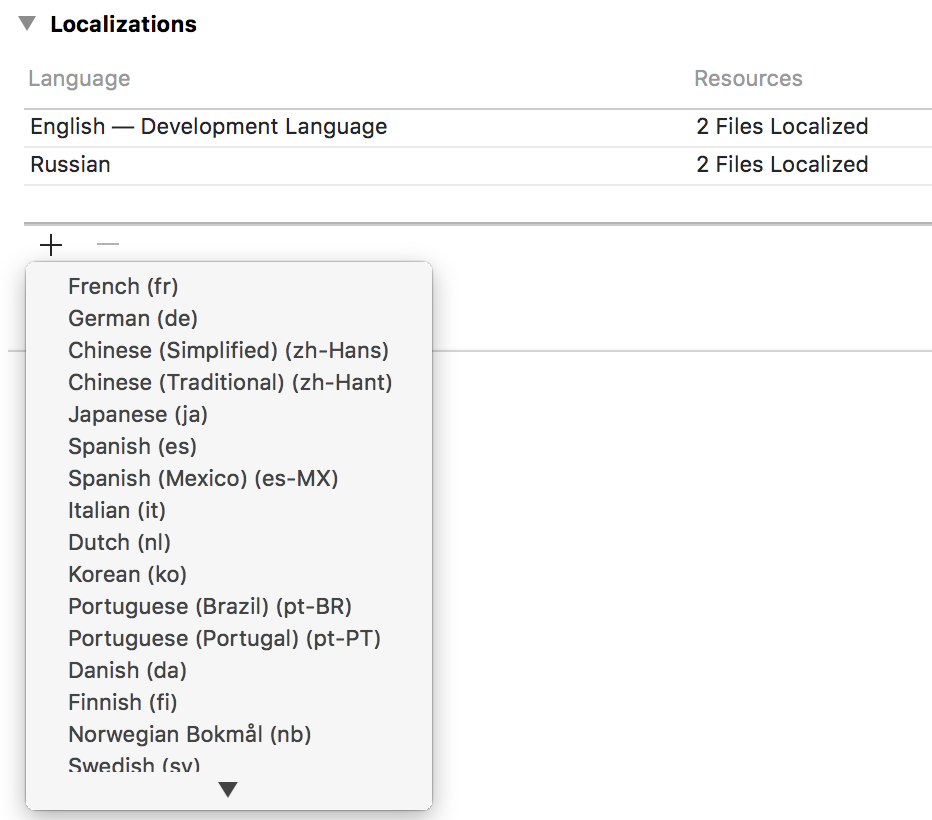 New Localization Language
Translate APAddressPicker.xib
Next you need to translate all strings into your language. Start by translating Address Title Label string in APAddressPicker.xib.
Press Cmd+Alt+1 to show File Inspector and place a checkmark besides your new language under Localization section, this will create a copy of APAddressPicker.xib for your language.
 APAddressPicker.xib Localization
Expand APAddressPicker.xib in Project Navigator (left pane in Xcode), select .xib for your language and translate CURRENT LOCATION text.
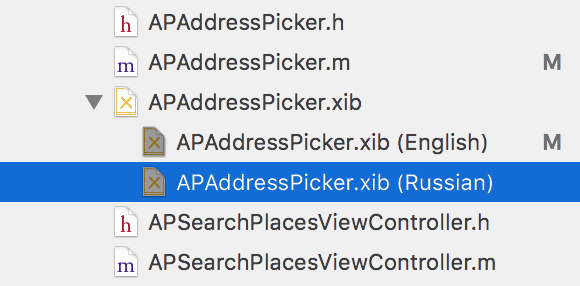 APAddressPicker.xib in Project Navigator
Translate Localizable.strings
Locate Localizable.strings in Xcode Project Navigator and click on the checkbox for the language you added earlier. Finally translate all strings to the right of = sign.
 Localizable.strings
3rd Party Libraries
I’ve used the following Cocoapods libraries.
- AFNetworking 3.0 - A delightful networking framework for iOS, OS X, watchOS, and tvOS
- PureLayout - The ultimate API for iOS & OS X Auto Layout — impressively simple, immensely powerful. Objective-C and Swift compatible.
- INTULocationManager - Easily get the device’s current location on iOS.
- GoogleMaps iOS SDK - Maps SDK for iOS from Google.
- libextobjc - A Cocoa library to extend the Objective-C programming language.
Once again, thank you so much for purchasing this control. As I said at the beginning, I’d be glad to help you if you have any questions relating to this theme. No guarantees, but I’ll do my best to assist. If you have a more general question relating to the code on CodeCanyon, you might consider visiting the forums and asking your question in the “Item Discussion” section.
Pavel Tisunov